Do you want to use Linux, but have to use programs like Photoshop or Office365? A Windows VM might be what you need.
You may have used or heard of VirtualBox or VMware, but the hypervisor I will use, Kernel-based Virtual Machine (KVM), is more memory efficent, smaller, better integrated with Linux and is open source. Virtualbox and VMware are easier to use as they are more straightforyouward in the VM creation process, but KVM will be important for part 2 of this blog post.
Install KVM and Virt-manager
sudo apt-get install -y virt-managerUse dnf instead of apt-get if you’re using fedora. On Arch, use pacman -S virt-manager
Windows and VirtIO driver ISOs
Windows: https://www.microsoft.com/en-us/software-download/windows10ISO
KVM VirtIO driver: https://fedorapeople.org/groups/virt/virtio-win/direct-downloads/stable-virtio/virtio-win.iso
Create your VM!
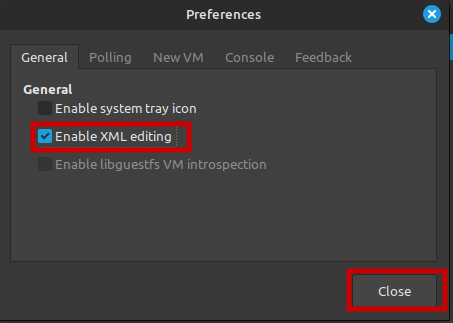
Open Virt Manager in your app launcher and go to Edit > Preferences, and check Enable XML editing. Note: The full name in the app launcher might be Virtual Machine Manager.
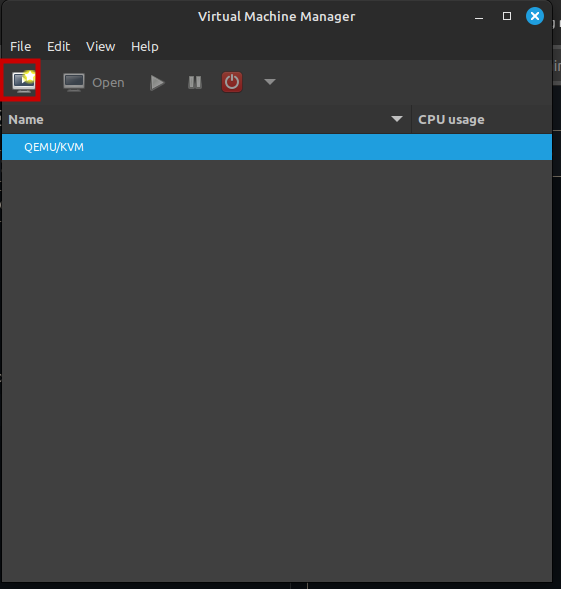
You should be seeing QEMU/KVM under the name column. If you aren’t, you may need to run sudo systemctl enable --now libvirtd. Click on the add new VM as shown in the screenshot below.
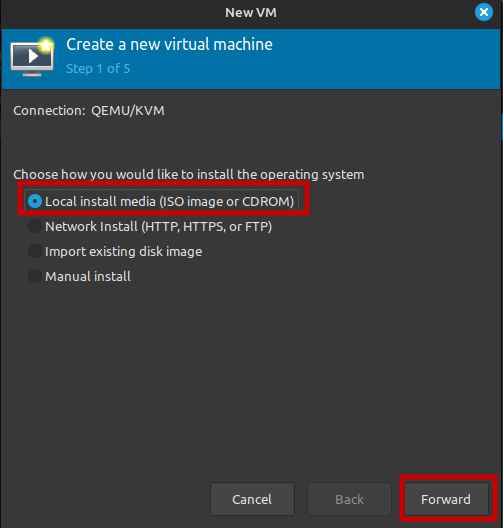
Select Local install media and hit Forward
Hit Browse and Browse Local and go to where you downloaded the Windows 10 ISO.
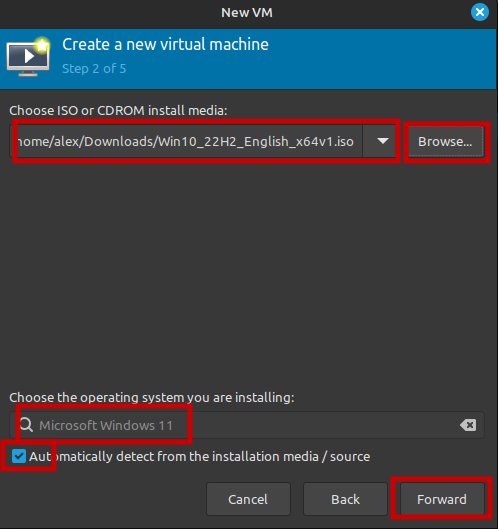
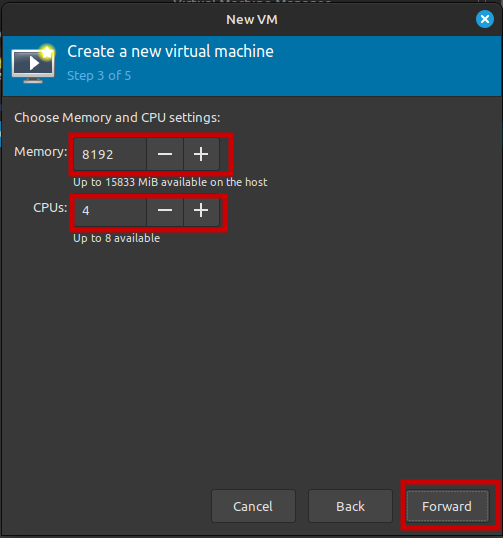
I recommend you give Windows 10 8 GB of RAM and 4 CPU Cores.
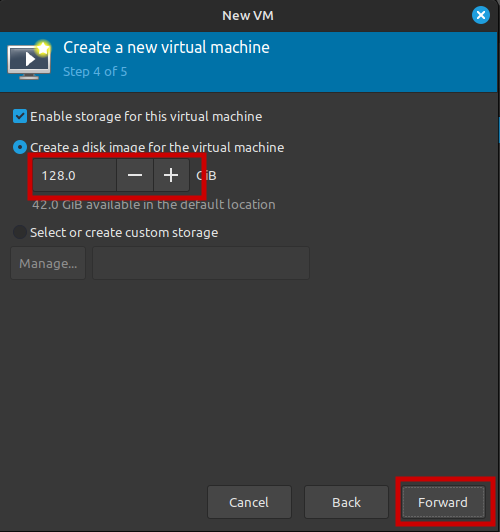
At storage creation, give it at least 128 GB of storage.
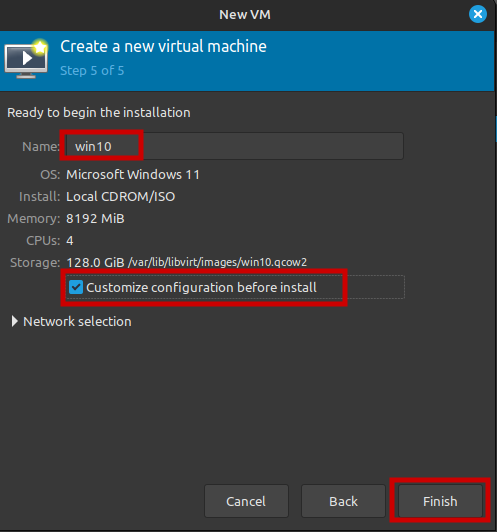
Give the VM a name of RDPWindows (if you are going to do part 2 of this blog post). Otherwise name it anything you want. Also, make sure you tick the customize configuration before install checkbox. Hit Finish
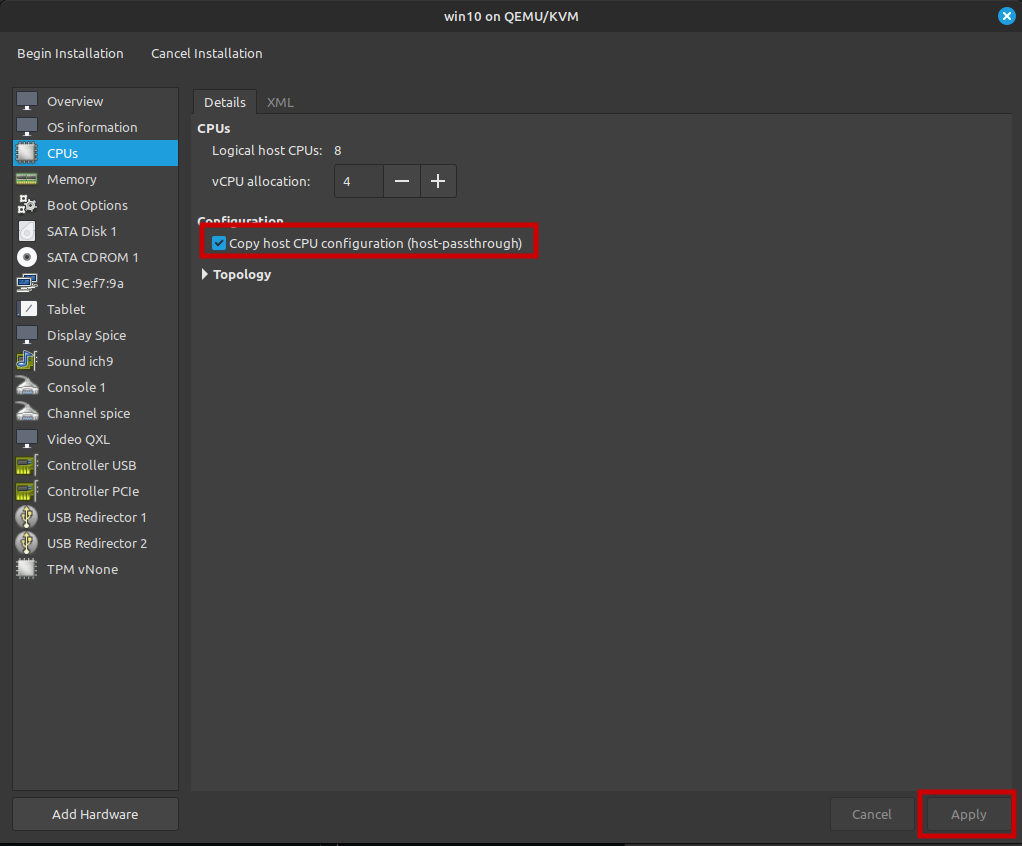
Go to CPUs, tick Copy host configuration and hit Apply.
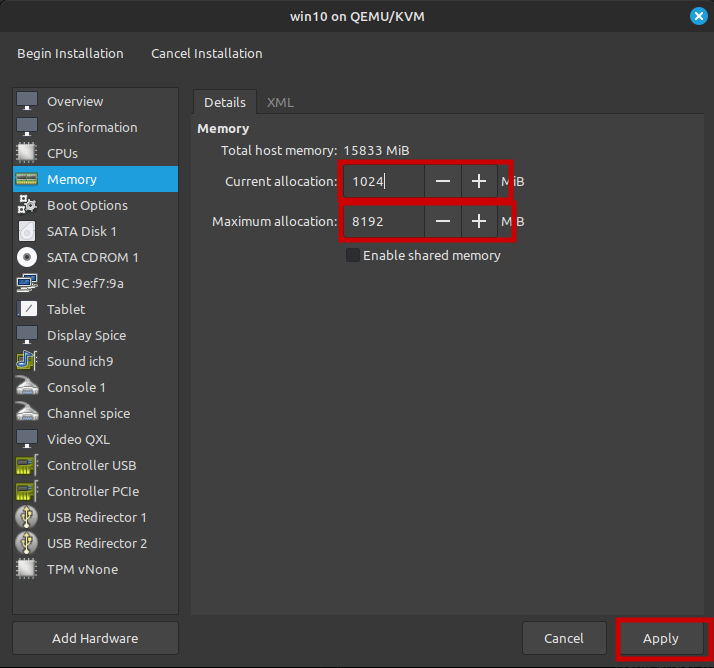
Go to Memory and set Current allocation to 1024 MB and Max allocation to 8192 MB. This will be useful if you want this VM running in the background and not use the full 8GB on VM startup.
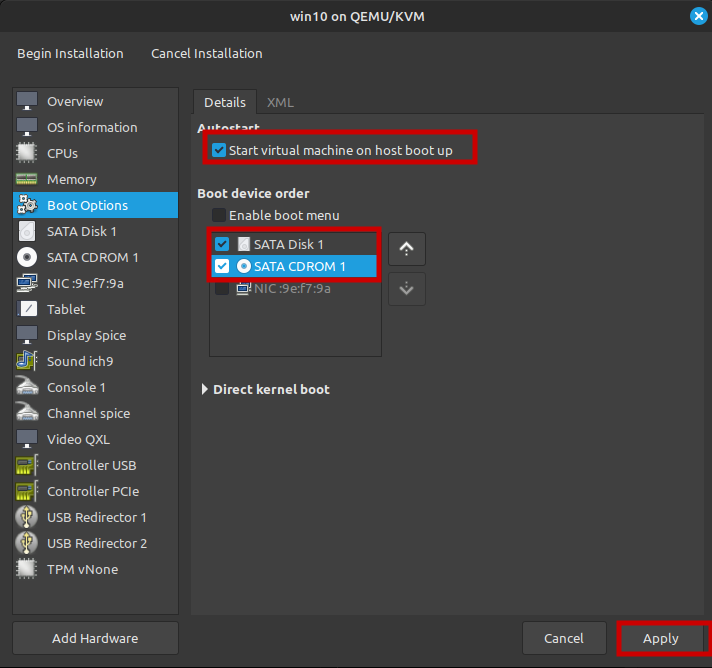
Go to Boot Options and tick Start virtual machine on host boot if you want this to start up when you boot your computer. Also, check the boot order and make adjustments if needed (like ticking the CDROM box).
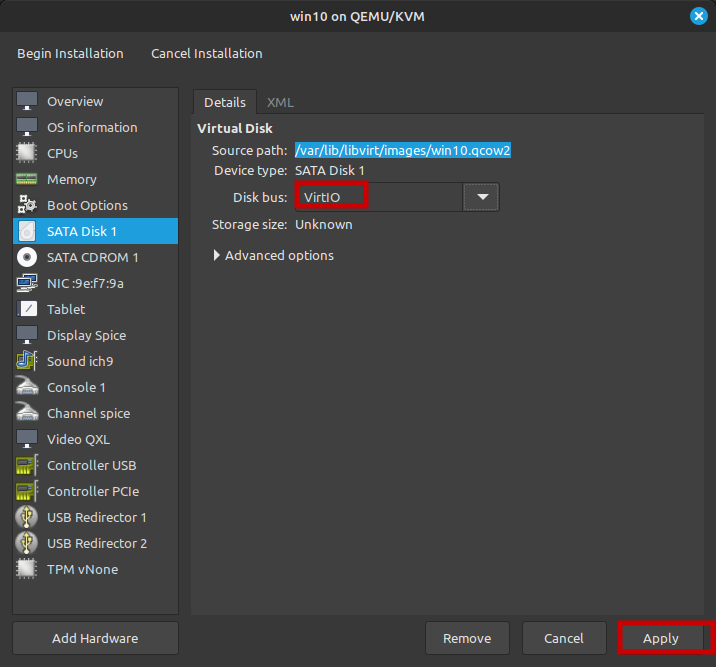
Go to SATA Disk 1 and set the Disk bus to VirtIO. This can make the VM faster than not using VirtIO.
Go to the NIC lower in the list and set the Device model to virtio.
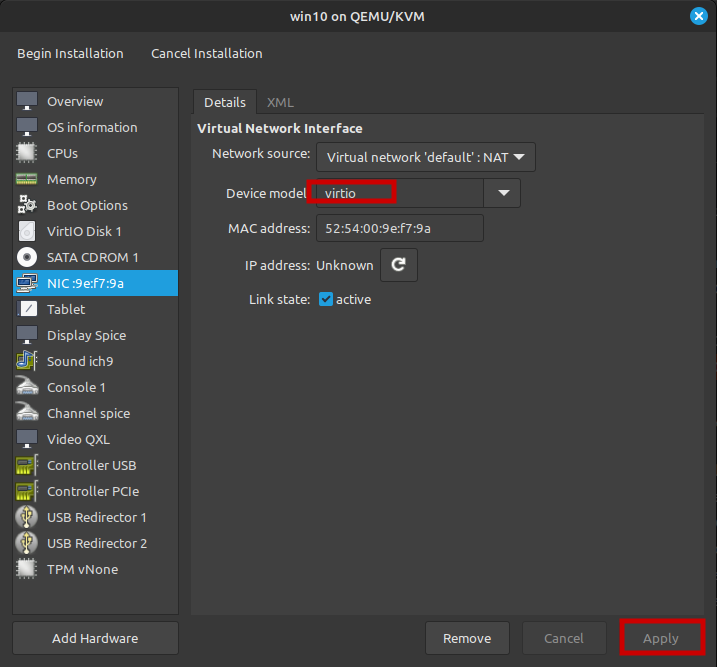
Now hit Apply and Add Hardware. Go to Storage and Select or create custom storage. Hit Manage and Browse local and browse to where you downloaded the VirtIO driver ISO. Also, make sure Device type is set to CDROM device.
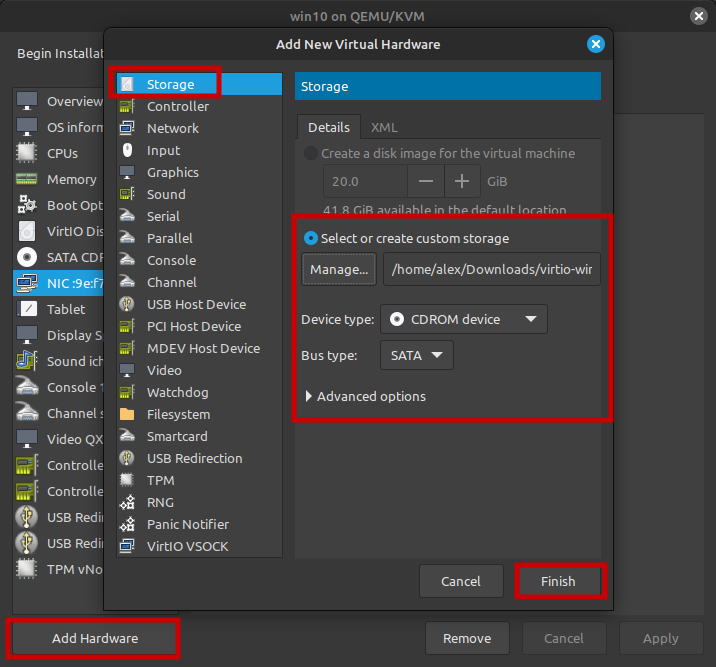
Hit Finish and go to Overview. Set chipset to Q35 and Firmware to UEFI. Finally hit Apply and Begin Installation.
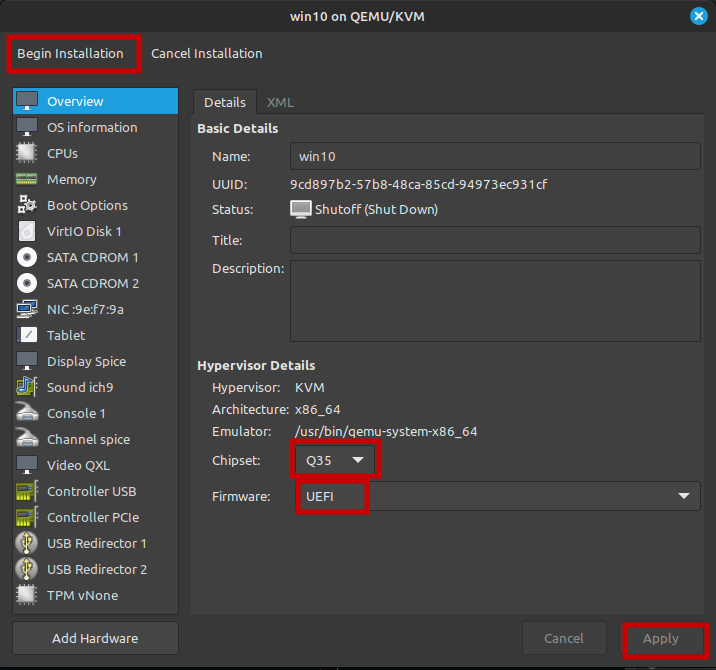
Now hit the play button in the top left to start the VM (if it hasn’t automatically done that). If it asks you to press a key to boot from CD, click on the VM window and press a key. You should see the following after a few minutes.
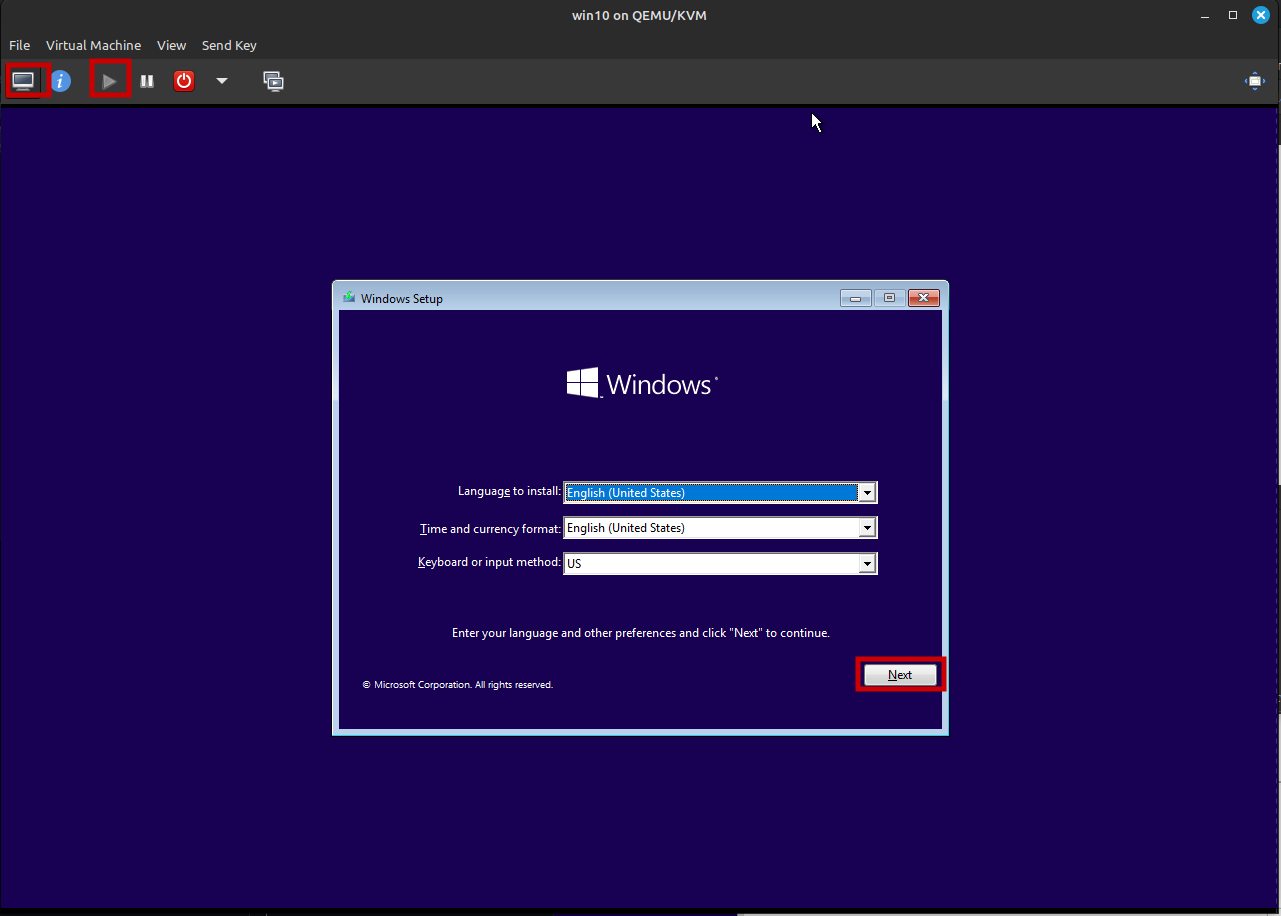
Hit next and you will see the following and Windows 10 will yell at you about not finding a disk to install too. That is exactly why we downloaded the VirtIO driver ISO from earlier. Hit Load Driver and browse on the following window.
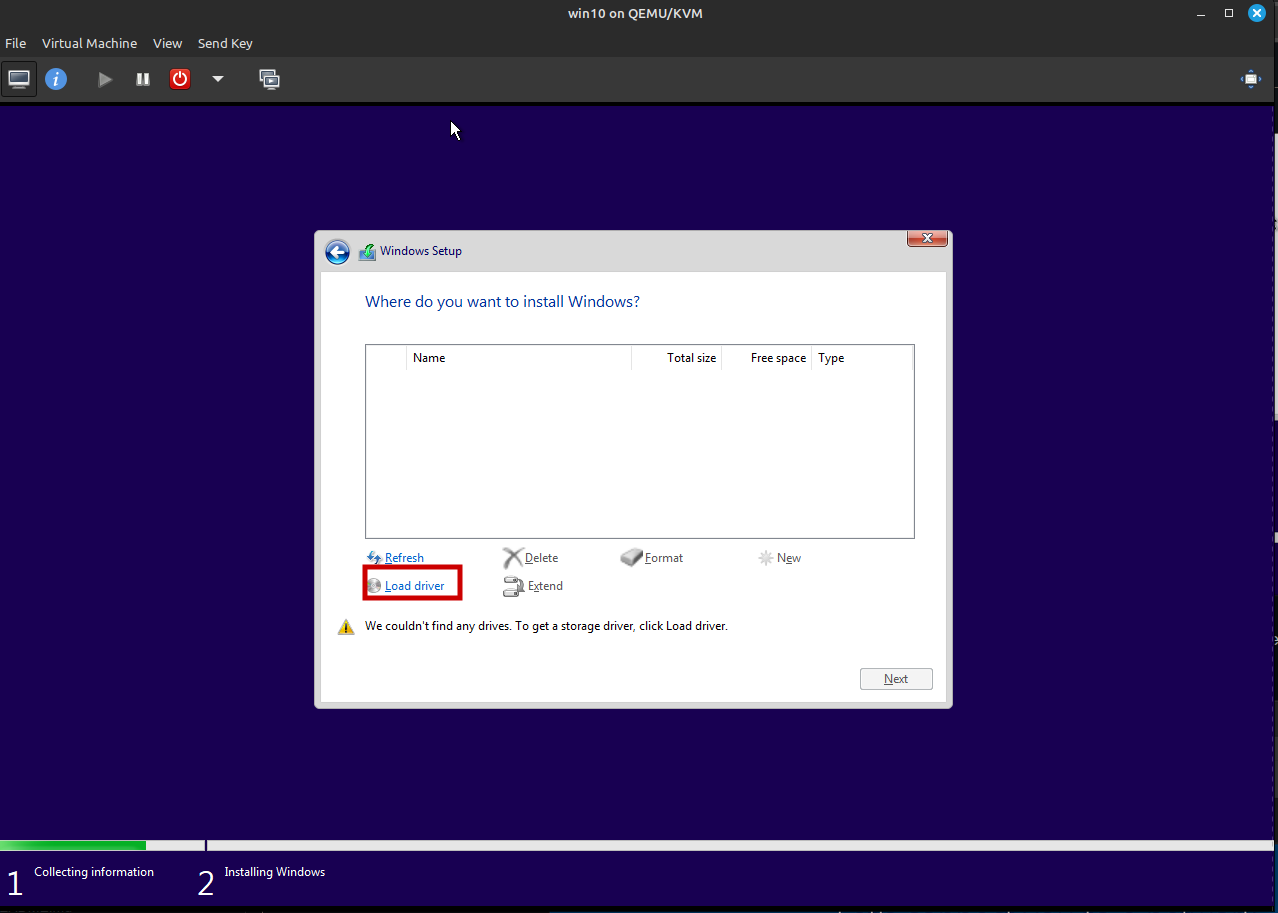
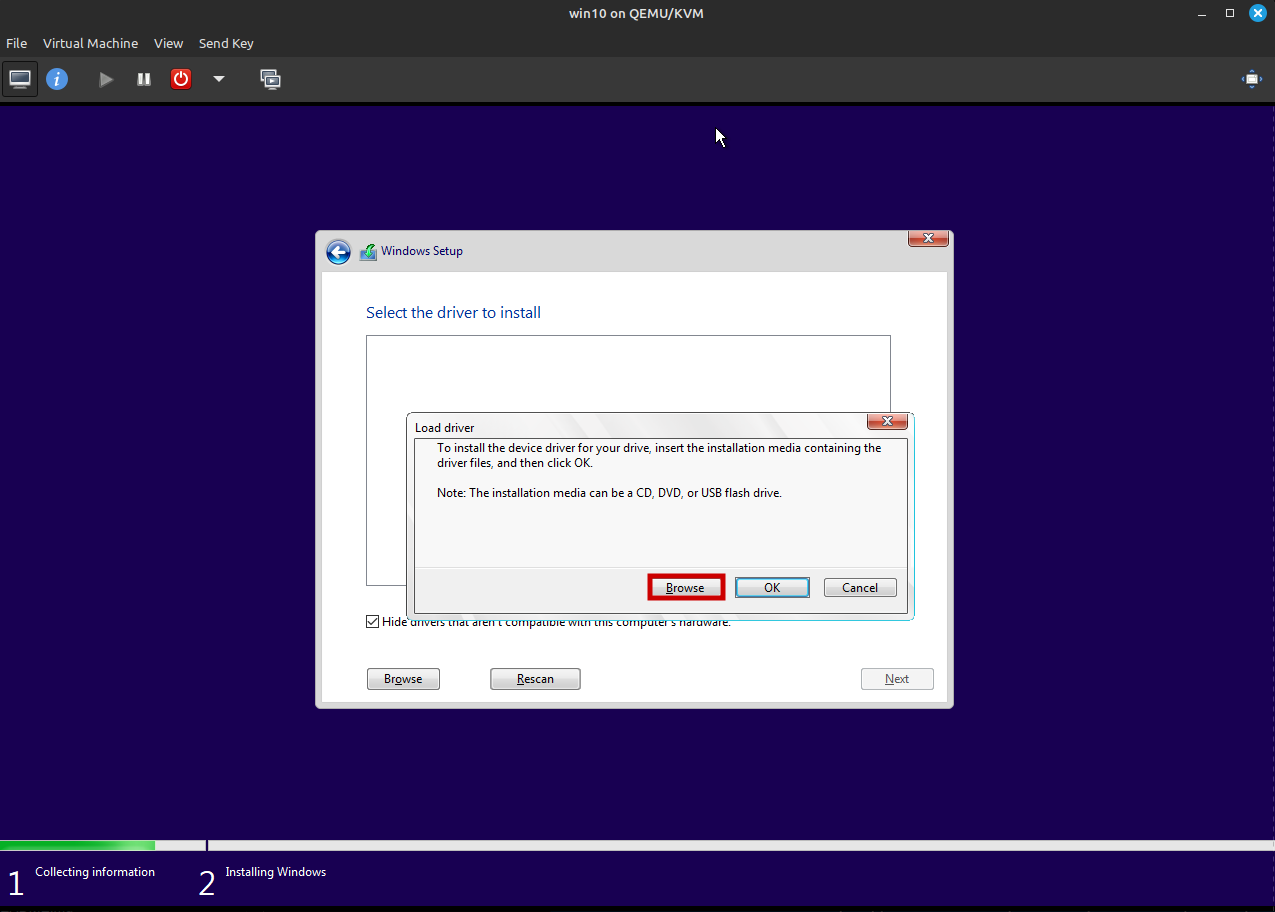
Browse to the VirtIO disk (probably under E:\) and hit ok.
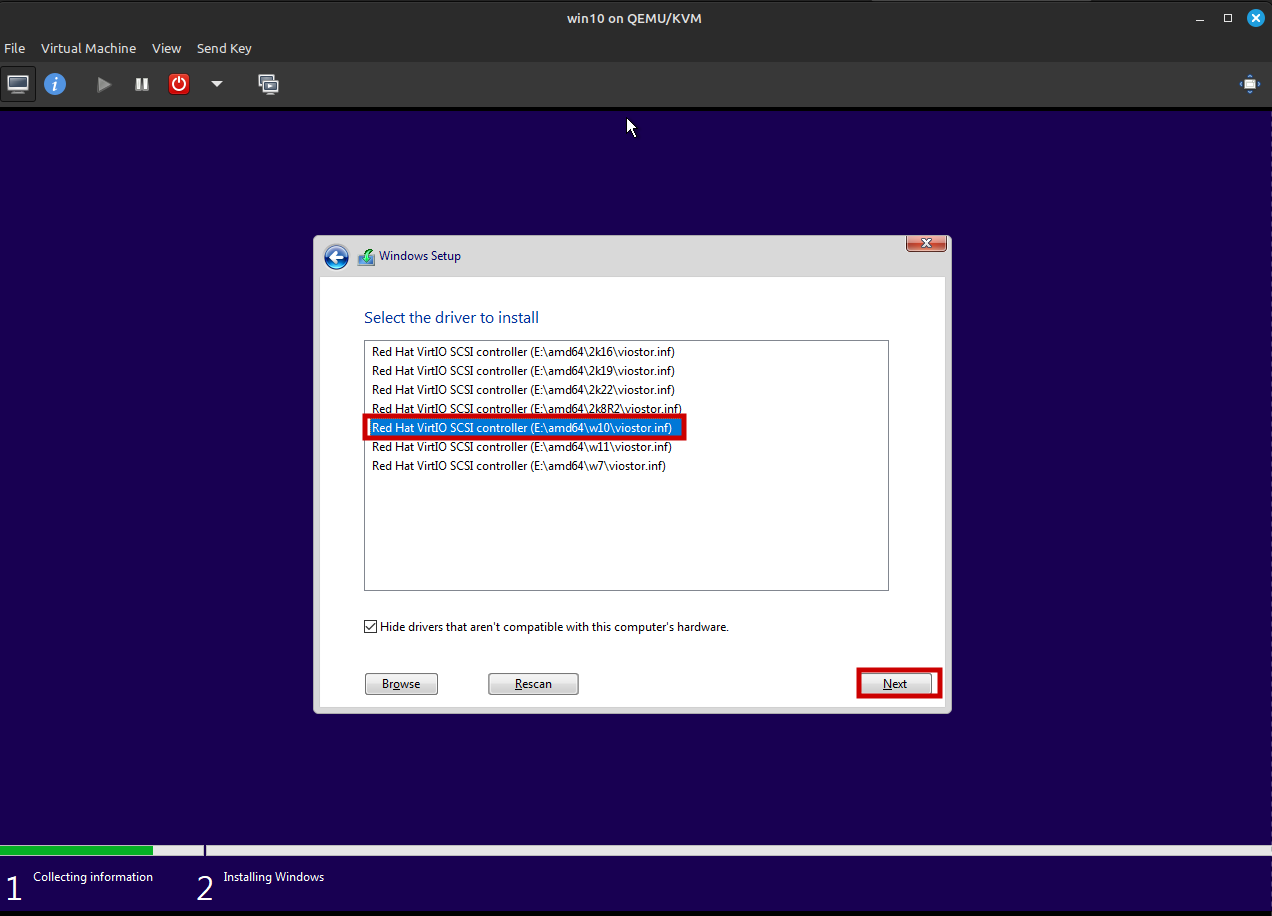
Select the third from the bottom for Windows 10, or second from the bottom for 11, or the one on the bottom for 7. The other ones are for Windows Server. Hit Next
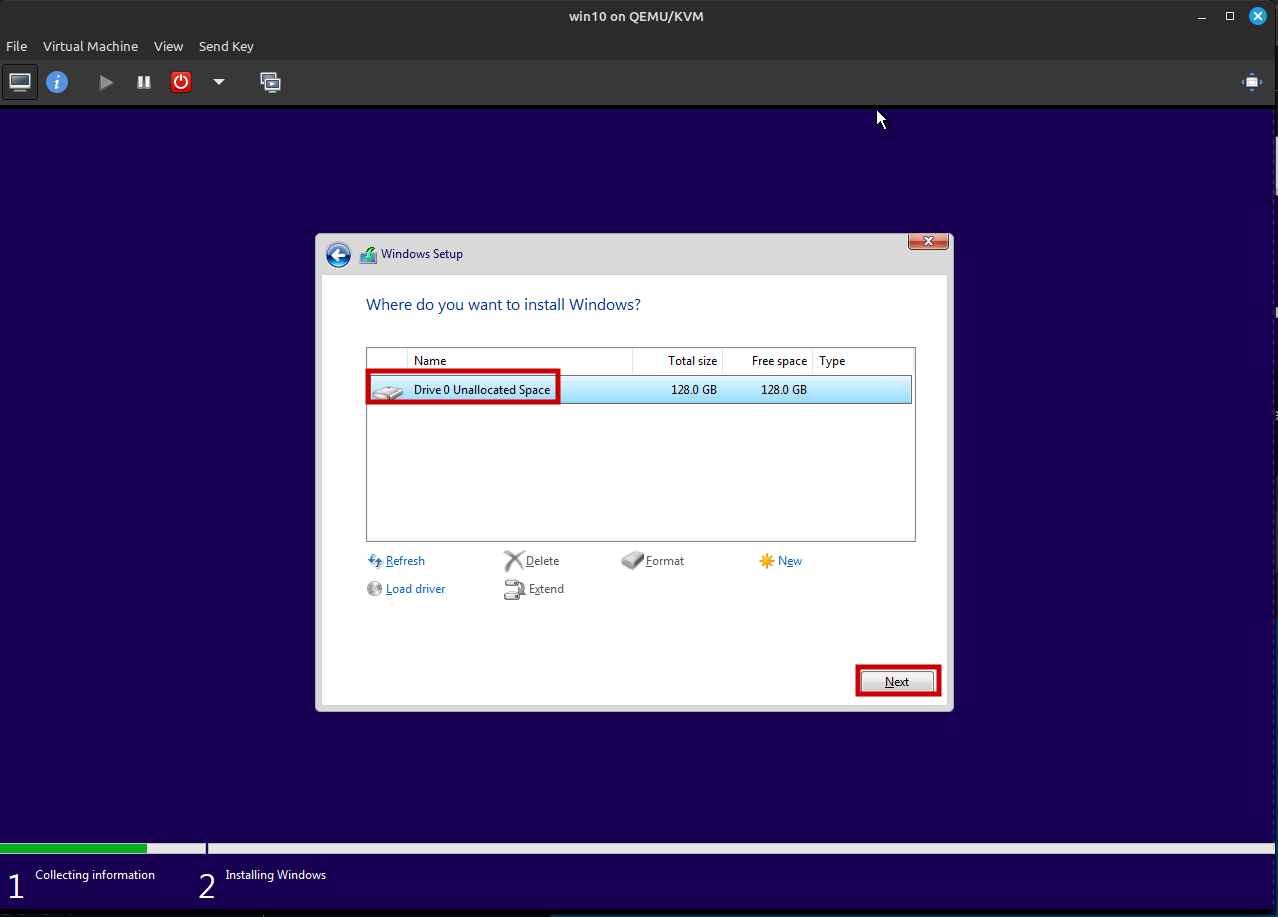
Hit Drive 0 and hit Next, it will automatically create the partitions. You should see this. This will take about 10 minutes to complete.
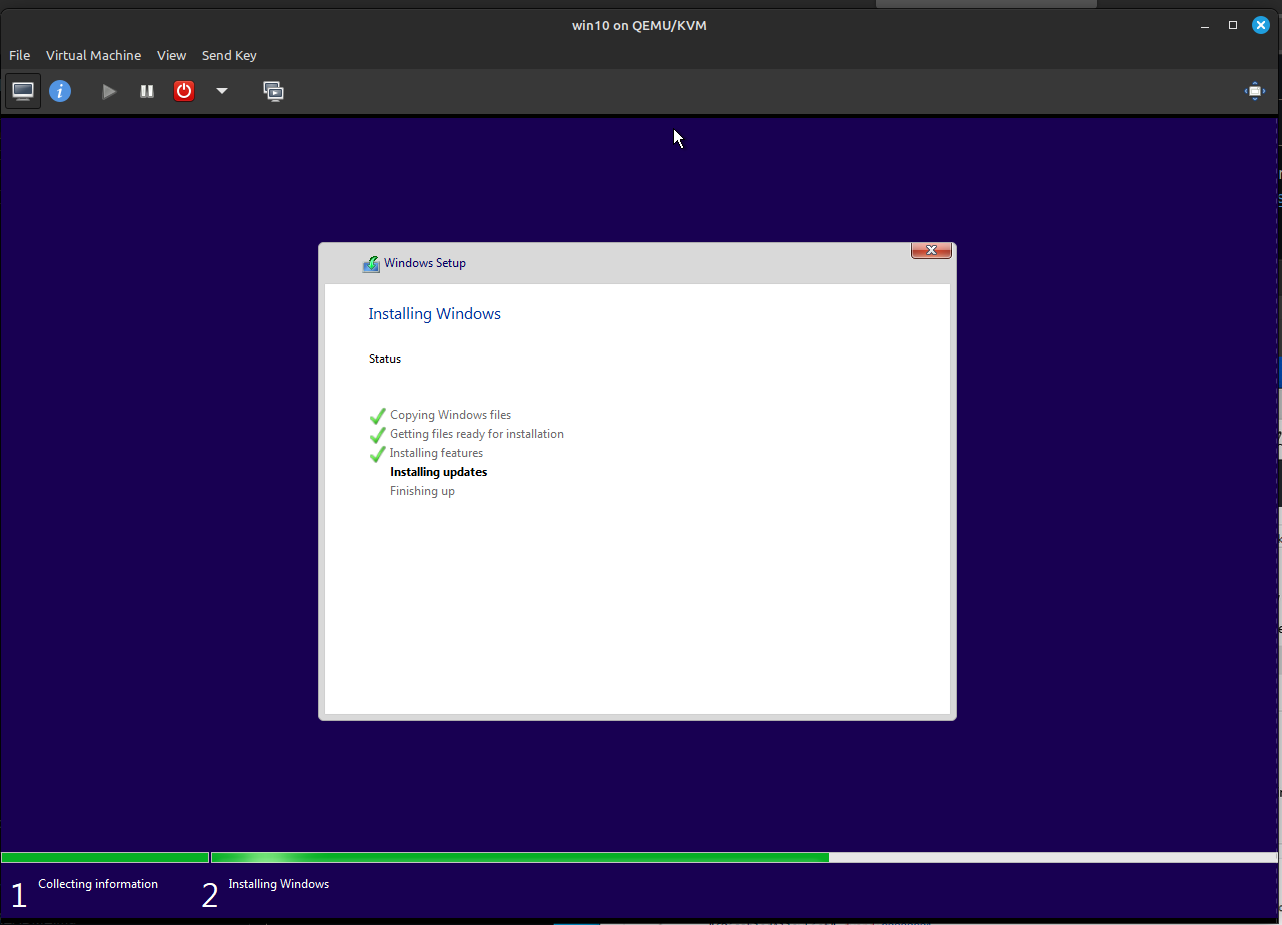
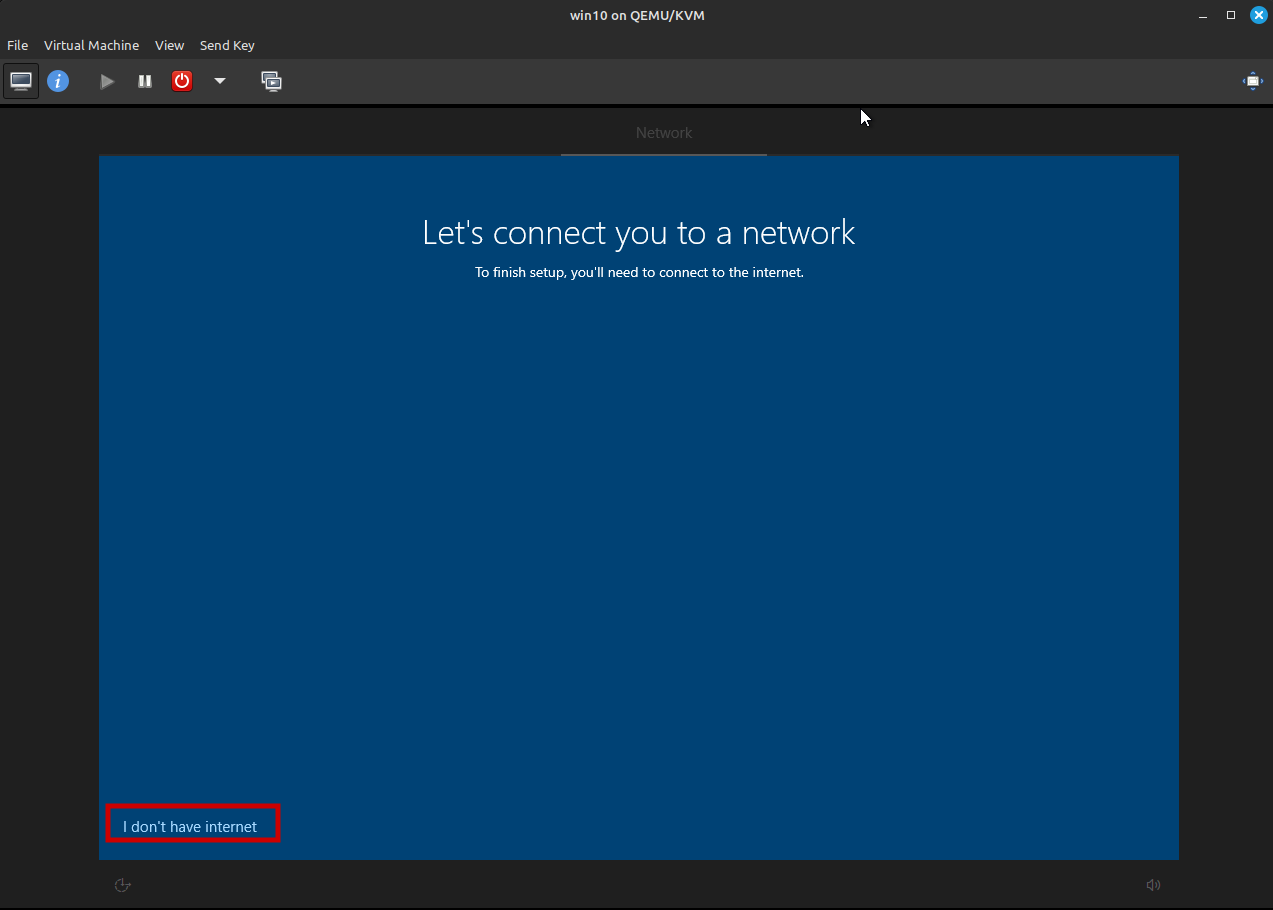
After Windows 10 boots into OOBE, click I don't have internet as we don’t have the drivers installed yet.
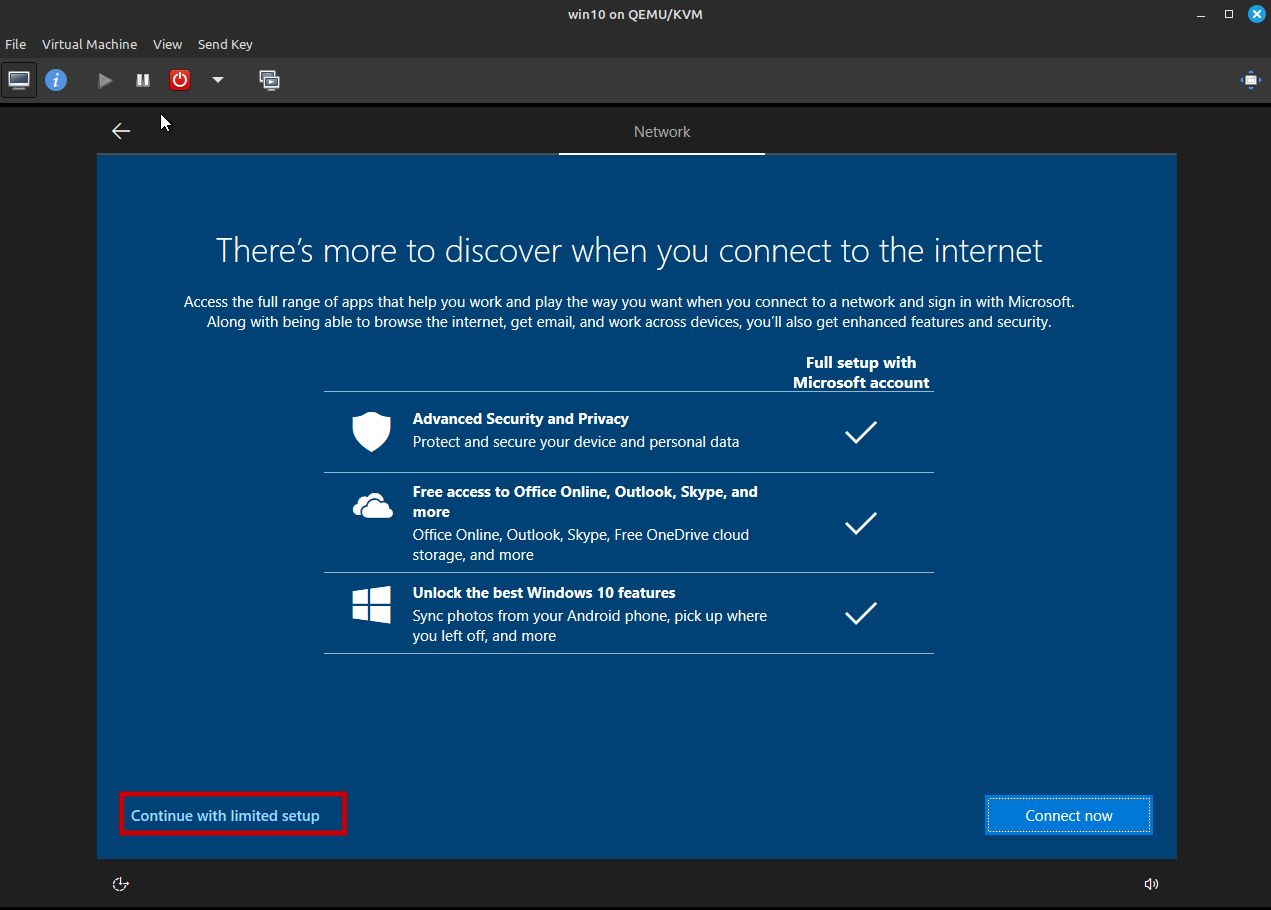
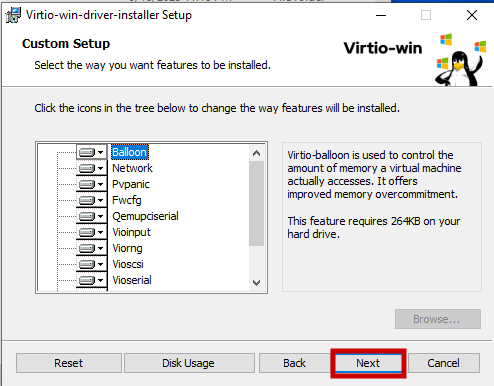
Click Continue with limited setup and create your account. It will take a few minutes to finalize. After it logs in, open File Explorer, navigate to the VirtIO drivers CD, and open virtio-win-guest-tools. Hit next to start the install
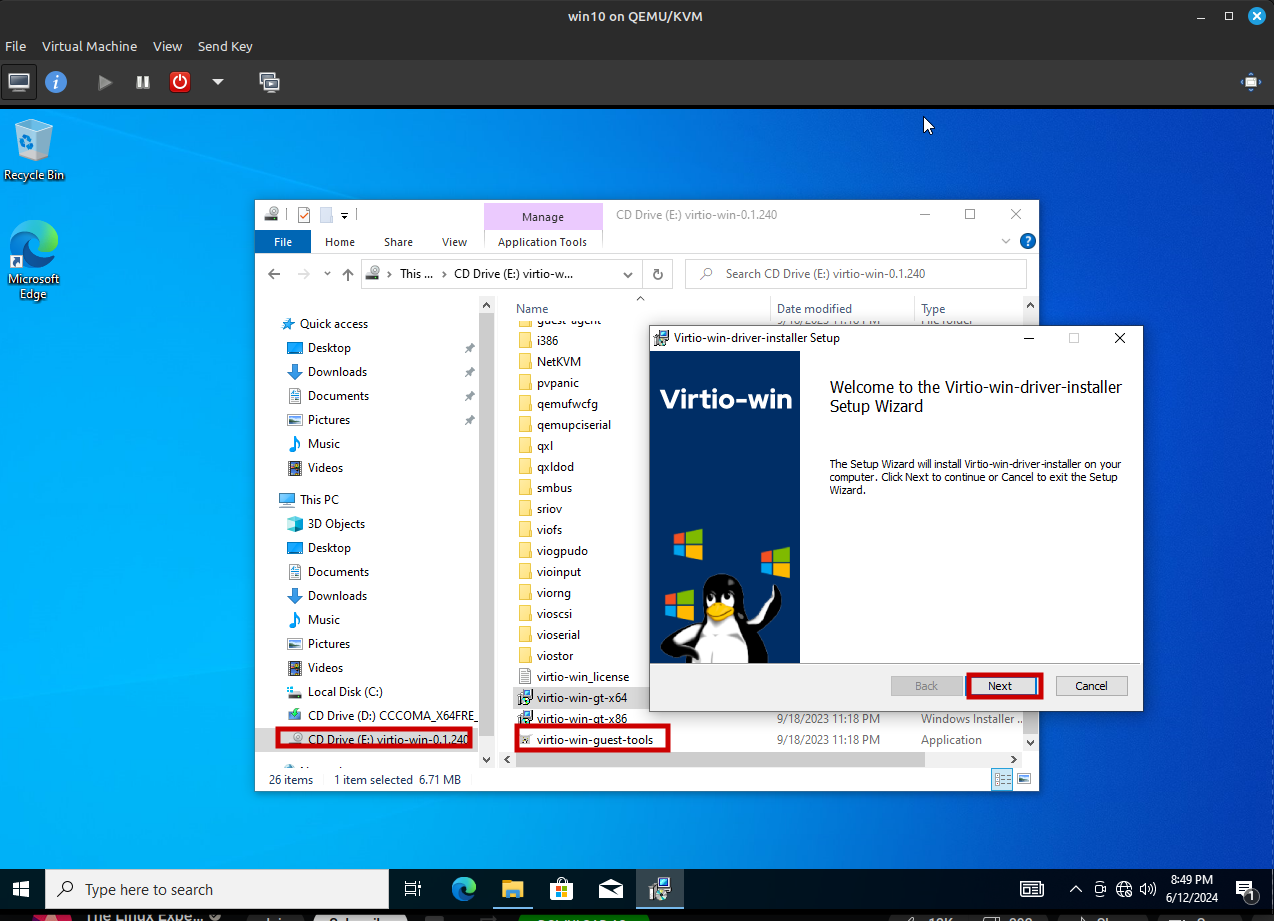
This will install all the components by default. Hit next
Reboot your Windows VM and its all ready. Just install your Windows apps.
Want to integrate Windows apps into the Linux desktop? Check out part 2.
